thecryptoecho
Chia Namesdao forwarding your website link with xch.limo service
After obtaining your xch Namesdao name, if you have a website, you can use the limo service to forward your limo address to your website. In my case, I don't have a website but I have this blog and a seldom visited YouTube channel. I did a live video on how I, without and technical background got the limo service working to forward to this blog.
Resources
Namesdao limo website: https://www.namesdao.org/dnslimo.html
4 Steps

Step 1 and Step 2: Create a DID and move your Namesdao NFT to your profile
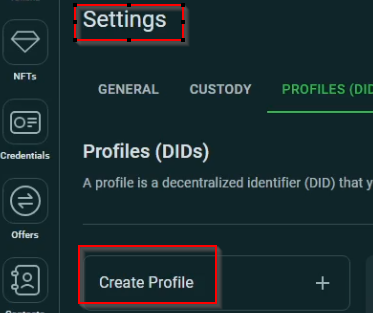
If you don't know how to do this yet, you can watch the video when I explain it briefly. In short, open up the Chia Official Wallet, click on settings, on the DID Tab, you should see the Create DID button

Step 3: Find your Wallet ID
Surprisingly to me, this was just a simple Integer.
chia wallet show
Step 4: WINDOWS - Creating the Powershell Script
You'll see in the video I really struggled running a JSON script.
Pro-tip: Use NOTEPAD++
Open up Notepad++ and copy the code.
{
    "wallet_id": "FILL_ME_IN",
    "metadata": {
        "namesdao": "{\"FILL_ME_IN.xch\": {\"dns\": {\"default\": [{\"type\": \"CNAME\", \"host\": \"@\", \"value\": \"www.FILL_ME_IN\", \"ttl\": \"3600\", \"priority\": \"1\"}]}}}"
    },
    "fee": "5"
}
Note that there are 2 FILL ME IN sections

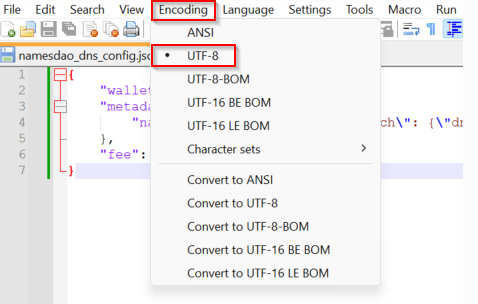
Under ENCODING, select UTF-8

Save the files as instructed as "namesdao_dns_config.json"
Run the following command, wait for the transaction to complete and run it again
.\chia rpc wallet did_update_metadata -j "LOCATION\namesdao_dns_config.json"Step 5: LINUX
It's so much easier. No Powershell script
chia rpc wallet did_update_metadata '{"wallet_id": FILL_ME_IN, "metadata": {"namesdao":"{\"FILL_ME_IN.xch\":{\"dns\":{\"default\":[{\"type\":\"CNAME\",\"host\":\"@\",\"value\":\"www.FILL_ME_IN\",\"ttl\":3600,\"priority\":1}]}}}"}, "fee": 5}'That's it
You can now visit my Blog by going to thecryptoecho.xch.limo
Help support me by donating below.
XCH Address: xch1m059af0f5h9y9fkn263daz7tp6k3cj470kgn486c4024mhmp9hqszshxyr